
Ringed with Nature Spanner Fold Card

I've been having so much fun playing with the Ringed With Nature Bundle and the Rings of Love Designer Series Paper. I added in the Amazing Phrasing Stamp Set for my Spanner Fold Card. Isn't this bright and cheery!
Both the Rings of Love Designer Series Paper (Level 1 with a $60 order) and Amazing Phrasing Stamp Set (Level 2 with a $120 order) are available for FREE during Sale-a-Bration.Spanner Fold cards are one of my favourites to make!
.jpg)
Instructions
- Cut Poppy Parade card stock 5 1/2" x 8 1/2" and score at 4 1/4". Fold on score line to form card base.
- Cut the card base at 1 1/4" and 4 1/4" from the bottom to the score line.
- Cut 4 pieces of Designer Series Paper 1" x 4"
- Cut 2 pieces of Basic White card stock 3" x 4"
- Cut Window Sheet 1" x 5 1/4" and adhere to the 2 side flaps on the front of the card base. Do not adhere to the middle flap.
- Adhere 2 of the pieces of Designer Series Paper to the 2 side flaps of the card base
- Emboss 1 piece of Basic White card stock using the Fall Leaf embossing Folder. Adhere to the middle flap of the card base.
- Cut Tree ring from Soft Suede card stock and adhere to the left side of the card base on the Window Sheet and side flap
- Cut out 2 stems from Parakeet Party card stock. Adhere to Tree Ring
- Stamp flower in scrap of Basic White card stock using Poppy Parade and Parakeet Party. Cut out using Paper Snips. Adhere to Tree Ring using Dimensionals.
- Stamp sentiment on scrap of Basic White card stock using Poppy Parade ink. Cut out using Banner Die from Stylish Shapes Dies
- Cut out Banner from Poppy Parade card stock. Cut in half lengthwise and adhere to the back of the stamped sentiment Banner.
- Adhere to the Window Sheet using Dimensionals
- Stamp sentiment using Parakeet Party Ink. Cut out using Paper Snips. Adhere to right flap using Dimensional. Only adhere to the left flap and not the middle flap.
- Wrap twine around top of middle flap twice and tie a bow.
- Adhere Matte Decorative Dots to card base
- Adhere 2 pieces of Designer Series Paper to sides of inside of card.
- Adhere Basic White card stock piece to middle of inside of card.
You can find all of the supplies for this card in my Online Store.
Check out my Youtube Video for tips and tricks to make this card. Don't forget to subscribe to my Stamping with Melva YouTube Channel!
Shopping with Me!
Use the following links to PDF copies of the catalogues:.png)
Please be sure to use the current Host Code BXPNFYRK to receive a free gift from me. When you place a $50 order (before shipping and taxes) using the Host Code, I'll send you a Thank You card by mail and a FREE tutorial by email as a thank you. If your order is over $200, please do not use the Hostess Code as you'll qualify for Stampin' Rewards, but I'll still send you the Thank You card and tutorial!
You can also purchase this tutorial with 13 Hues of Happiness Themed tutorials for $20! Check them out in my Square Store!
Here's my card that is included in the tutorial.

Christmas Card Buffet Virtual Class
Register now for our upcoming Christmas Card Buffet Class on September 10th featuring the Decorated With Happiness Stamp Set.Class includes Decorated with Happiness Stamp Set plus make and take kit with 10 cards (2 of 5 designs) plus PDF and Zoom Class (will be recorded so you can view later).
Add on the Dies for $52 extra and you will get a FREE Sale-a-Bration Level 1 Reward of your choice!
.png)
Register Now - Registration closes August 18
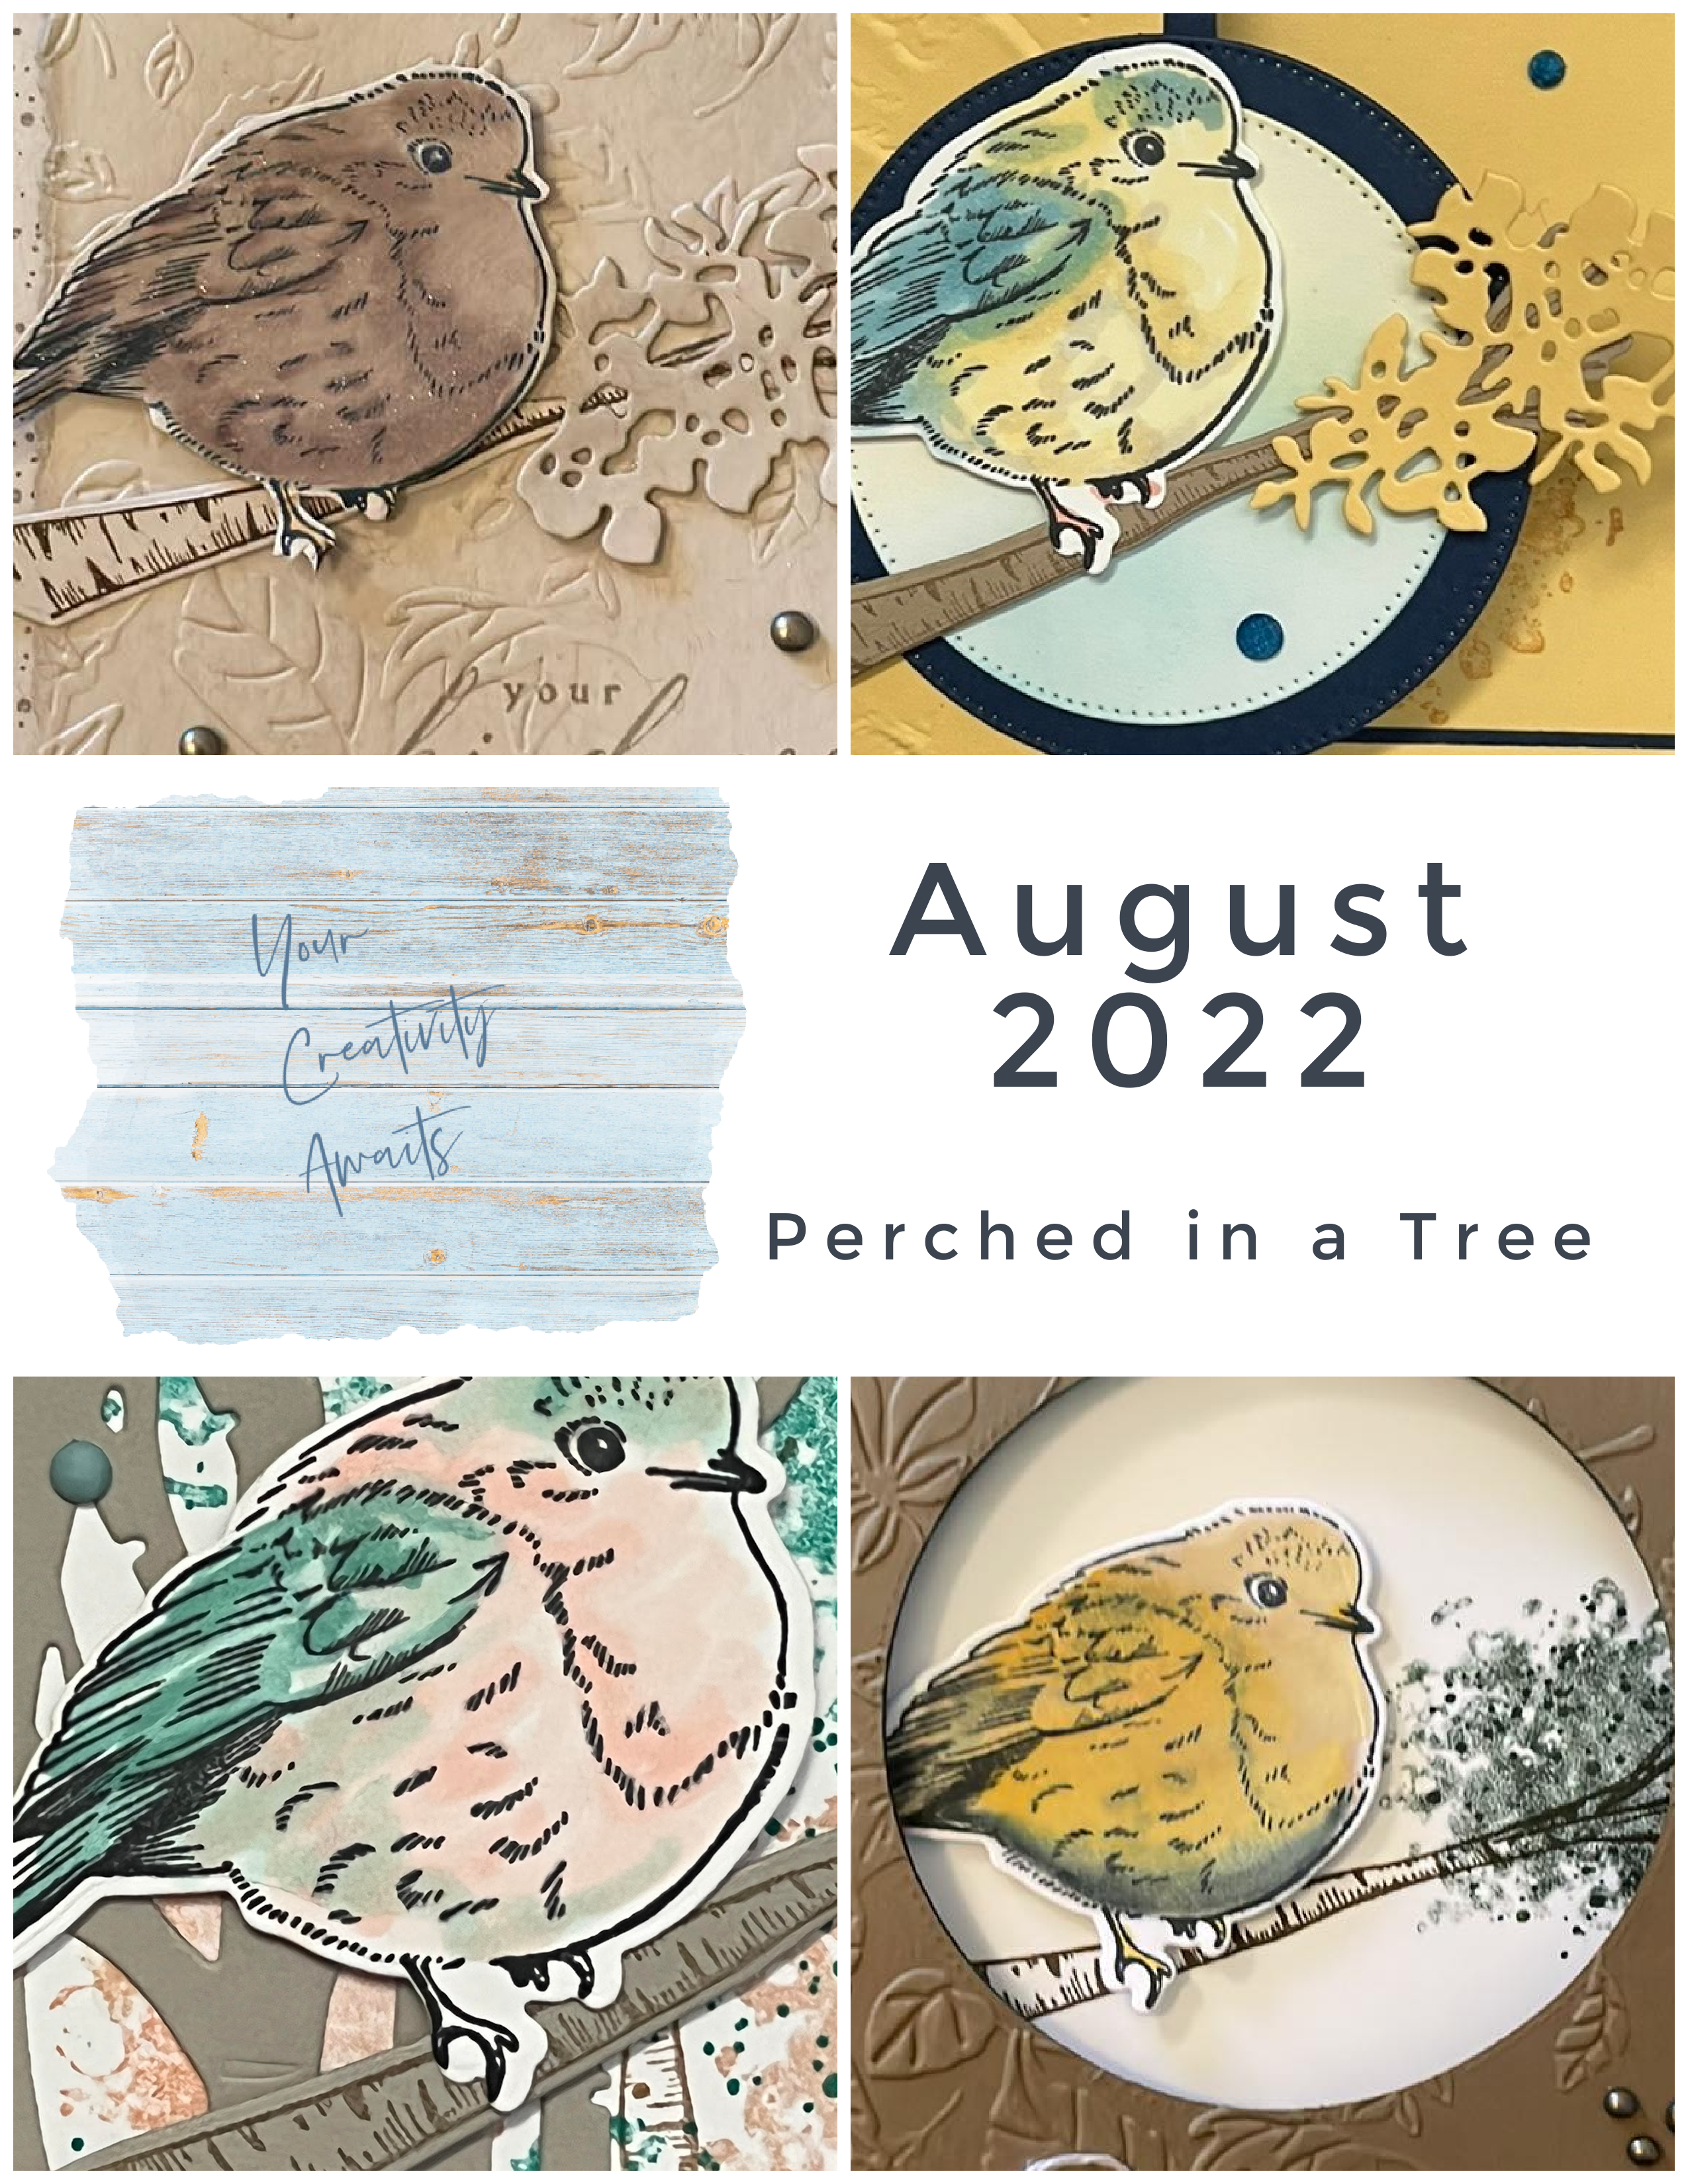
Your Creativity Awaits
August Kit features Perched in a Tree from the July to December Mini Catalogue
Do you love to craft and are you looking for a kit that ships directly to you each month with special perks each month? Then you will LOVE “YOUR CREATIVITY AWAITS”!
With “Your Creativity Awaits”, each month you will receive an exclusive make and take kit (2 cards of 4 designs) plus a PDF Tutorial. All for only $60 per month shipped directly to you or $57 local pick up.
Each month, the Design Team will choose one stamp set or bundle and design fun projects for you to create. The stamp set is included in your kit. If you don't already own the dies or punch, you may add it to your kit or use what you have.
- Featured stamp set
- 8 Cards (2 each of 4 different designs) - designed by Your Creativity Awaits Team
- Exclusive Project tutorials you can follow along with to create your cards
- Extra product (value will depend on the price of the stamp set)
After 6 consecutive months of membership, you will receive a thank you of $25 product credit (before shipping and taxes) to spend on whatever you choose!
Your Creativity Awaits Kit Timelines
The upcoming kit information including supplies needed will be announced by the 15th of the previous month
Sign up must be done by the 2nd Sunday of the month
Kits will be shipped and tutorials emailed out by the 4th Tuesday of the month (subject to unforeseen delays in the shipment of product from Stampin’ Up!)
Cost
- Shipped: $60 monthly
- Porch Pick-up: $57 monthly
- Add-on dies $53 and you will get a Level 1 Sale-a-Bration Reward for free - it could be the coordinating Designer Series Paper!
Available to Canadian Residents Only
The August kit features the Stampin' Up!® Perched in a Tree - Registration closes August 14
- Visit my Online Store here
- Shop the Clearance Rack here
- Earn FREE Stampin' Up! Products - Join my Rewards Program
- Join my Team here
- Check out my Tutorials for Sale
- Check out my Upcoming Events
- Buy Retired Stampin' Up! Products (Canadian Residents Only)
- Subscribe to Paper Pumpkin
- Your Creativity Awaits - July 2022 (featuring Perched in a Tree)
- Register for Cards and Bingo - August 13
- Register for Christmas Card Buffet - September 10
")
")


 Designer Series Paper")


No comments
Post a Comment