
Creativity Abounds - October 2021

Welcome to our Creativity Abounds Blog Hop. We are a group of very keen Stampin’ Up!® Demonstrators from all around the world who are coming together to share our creative ideas with you. We are happy that you can join us and hope that we can inspire you to make creations of your own. You may be starting here or you may have come from someone else's blog - either way there is a list at the end of this post to help you move around all the different blogs and get many amazing ideas. We all have our country listed - so if you are looking for a demonstrator in your country, these demonstrators would love to look after you with your Stampin' Up!® shopping or if you would like to join our Stampin' Up!® teams. Here's our amazing Creativity Abounds Design Team!
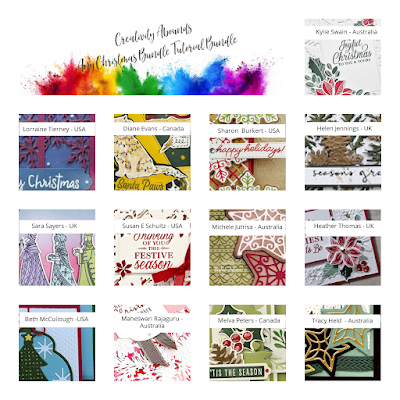
Here's our amazing Creativity Abounds Design Team!

Last month we had a very successful Stamp Camp. It was so much fun stamping with people from around the world! We're looking forward to our next one in January 2022! Stay tuned for more information!
Our theme this month is "Any Christmas Bundle" from either the Stampin' Up! Annual Catalogue or July to December Mini Catalogue! My project today is a Trifold Angle Fancy Fold Card featuring the Painted Christmas Product Collection. I love this fancy fold and had fun making my card.

Instructions
You can check out my YouTube Video to follow along with the written instructions.
- Cut Evening Evergreen card stock 5 1/2" x 11" and score at 3 3/8" and 7 5/8". Fold on score lines for form card base.
- For the right hand side, line up the score line in the cutting track of your trimmer and the point at the 1 1/2" mark on the right hand side of your trimmer cutting track. Cut on the angle.
- Turn the card stock so that the point you just created is in the track of the trimmer and the bottom point is at the 1" mark on the right hand side of your trimmer cutting track. Cut on the angle.
- Now turn the card and repeat on the other side.
- Cut 2 pieces of Designer Series Paper 3 1/4" x 5 1/4".
- Line up the top left corner in the cutting track of your trimmer and the right hand corner at 1 1/2" on the right hand side of your trimmer. Cut on the angel
- Turn the DSP so that the point you just created is in the track of the trimmer and the bottom point is at the 1" mark on the right hand side of your trimmer cutting track. Cut on the angle.
- You'll need to turn the other piece DSP so that the "wrong side" (that is the side you will glue down) is facing up and repeat the cutting.
- Adhere the DSP to the flaps of your card base using your favourite adhesive.
- Cut Basic White cards stock 4" x 5 1/4".
- Cut DSP 1" x 5 1/4" and adhere to the right hand side of the Basic White card stock using your favourite adhesive.
- Stamp sentiment using Evening Evergreen about 3" from top.
- Adhere to the inside of your card base.
- Cut Evening Evergreen card stock 1" x 11" and wrap around card base so that the seam is at the front (it will be covered) - don't make this too tight or you will have a hard time getting the belly band on and off.
- Adhere the ends of the belly band together.
- Wrap ribbon around Belly Band and adhere at the front covering the seam.
- Stamp sentiment on a 2" x 3" piece of Basic White card stock using Evening Evergreen ink.
- Cut out using die.
- Adhere to Belly Band using Dimensionals.
- Cut out 3 small pine cones from Gold Foil and Early Espresso.
- Adhere together using Multi Purpose Adhesive Glue.
- Adhere to Belly Band using Dimensionals.


Shopping with Me!
Use the following links to PDF copies of the catalogues:


- Featured stamp set
- 8 Cards (2 each of 4 different designs) - designed by Your Creativity Awaits Team
- Exclusive Project tutorials you can follow along with to create your cards
- Extra product (value will depend on the price of the stamp set)
- The upcoming kit information including supplies needed will be announced by the 15th of the previous month
- Sign up must be done by the 2nd Sunday of the month
- Kits will be shipped and tutorials emailed out by the 4th Tuesday of the month (subject to unforeseen delays in the shipment of product from Stampin’ Up!)
- Shipped: $57 monthly
- Porch Pick-up: $53 monthly

- Visit my Online Store here
- Shop the Clearance Rack here
- Earn FREE Stampin' Up! Products - Join my Rewards Program
- Join my Team here
- Check out my Tutorials for Sale
- Check out my Upcoming Events
- Buy Retired Stampin' Up! Products (Canadian Residents Only)
- Your Creativity Awaits - November 2021 (featuring Eden's Garden)

")
")

 Designer Series Paper")

 Shimmer Ribbon")


I just love your card Melva !!!!
ReplyDeleteGorgeous card! Love it!
ReplyDeletebeautiful card, I love this fold
ReplyDeleteAbsolutely gorgeous card, Melva.
ReplyDeleteThanks Maheswari!
DeleteGreat card! I'm going to have to watch your video because I'm uncertain about what you call the right side of the trimmer. I'm a lefty so stuff can be kind of backwards for me. I appreciate you sharing!
ReplyDeleteThanks Crystal. If you have questions, let me know.
DeleteLove this Melva. I am going to try this style of card.
ReplyDeleteI keep meaning to have a go at this style of card, so thank you for inspiring me with your lovely card.
ReplyDeleteThanks Helen!
DeleteI need to try this fold. Your card is inspiring
ReplyDeleteBeautiful card! Love the angled front.I look forward to trying out this fold
ReplyDelete